 Reflections - Andre Kertesz
 Born in 1894 in Hungary, he emigrated to the US due to the war and discrimination towards jews. His minimal linguistic skills limited him to the companies he could work for and the companies who wanted him to work for them he turned down because he felt they weren't 'exploring' enough for him. He had been criticised for taking extra images he wasn't instructed to and he felt it was holding him back.
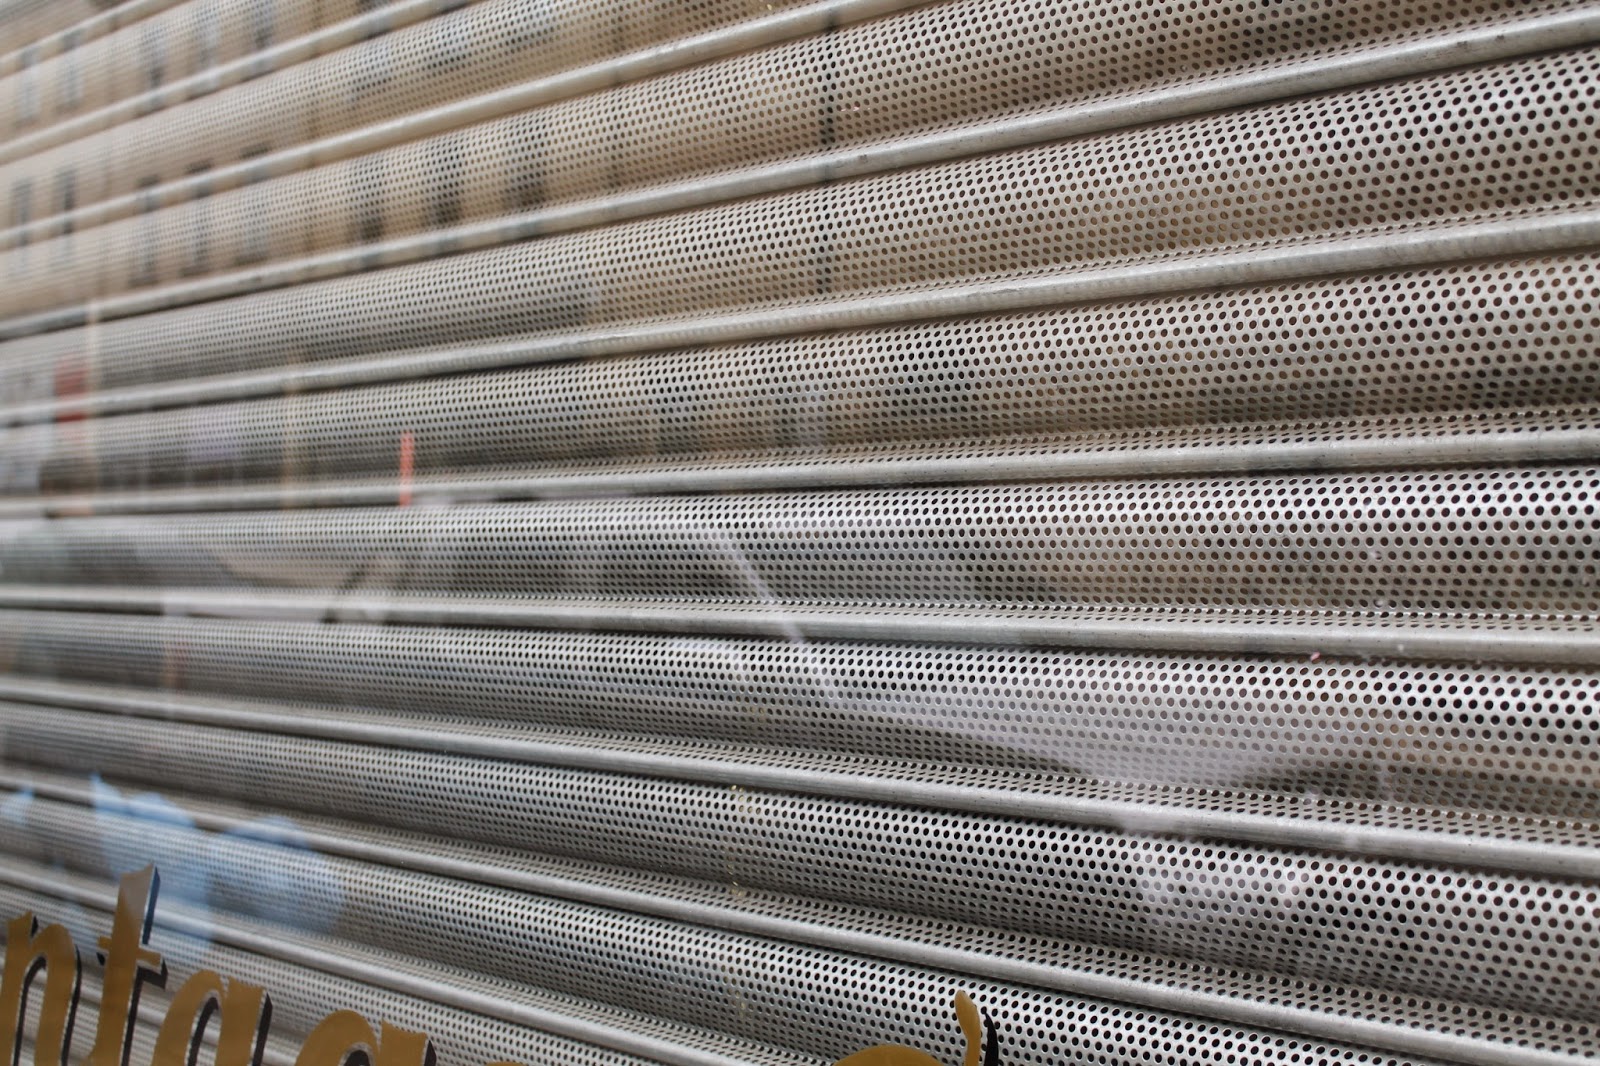
He did a lot of work with reflections and distortion, which I personally don't like. I like the reflection images, but find the distortion Images to be too much and it feels like there's too much going on in the image, which is why most of my images are reflections rather than distorted.
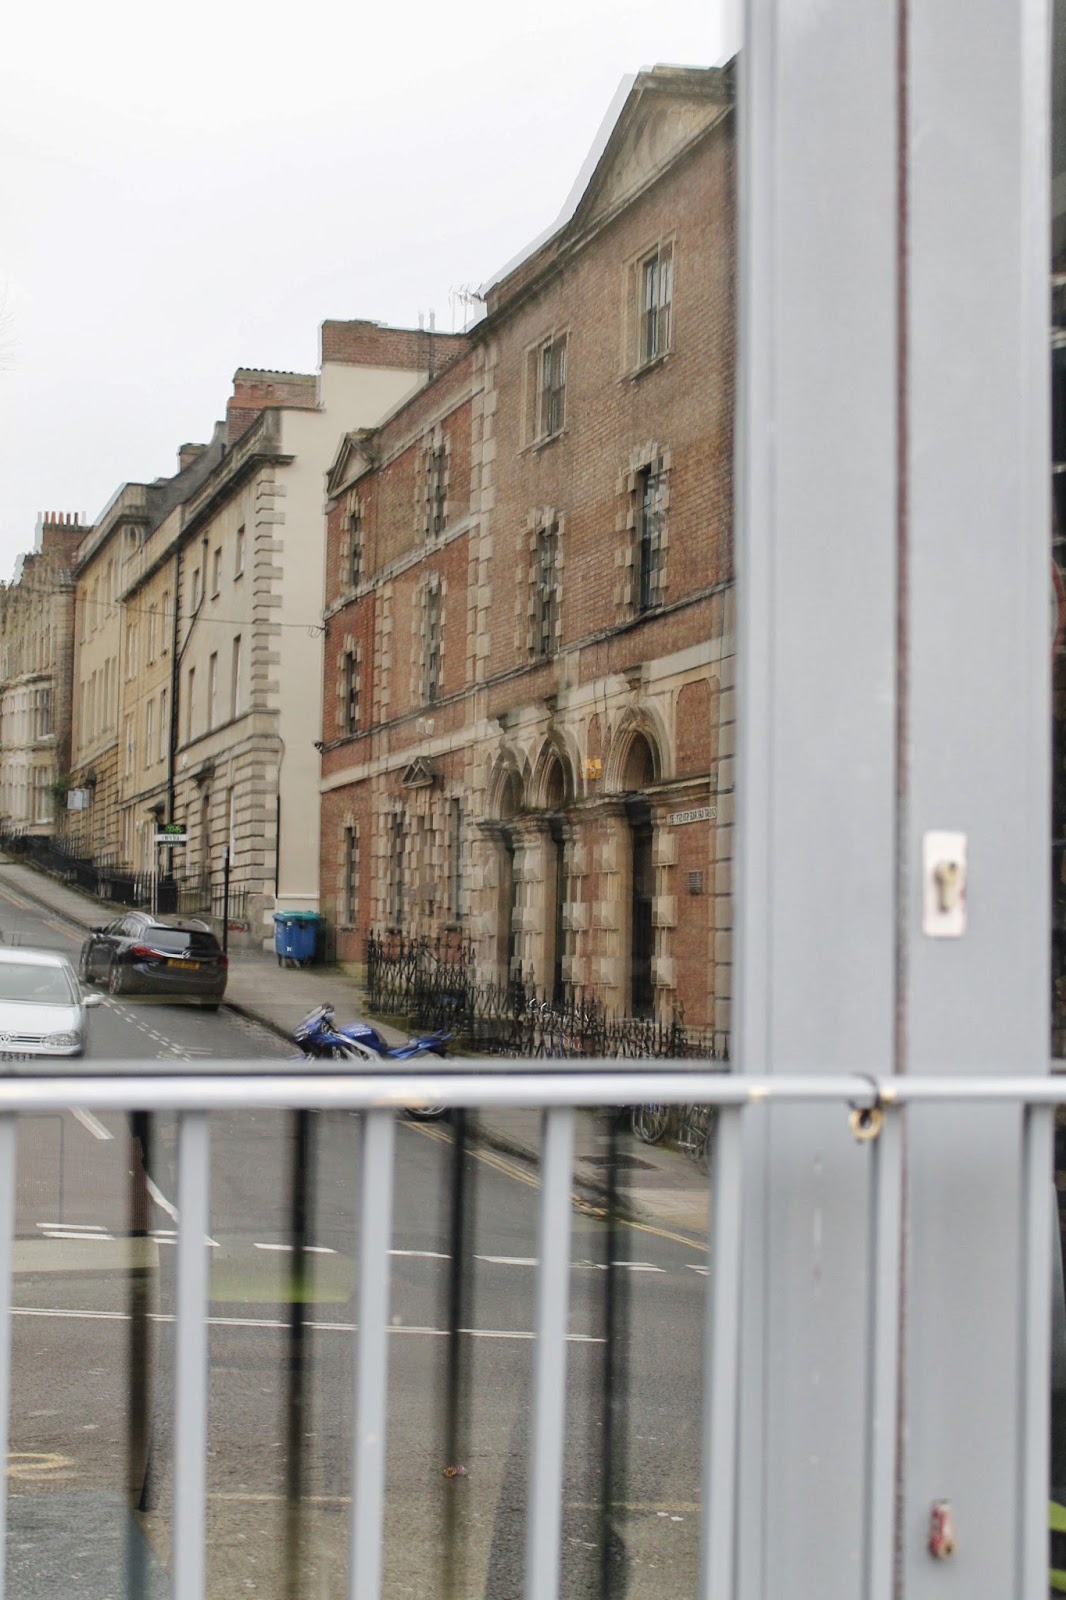
Mirrors -
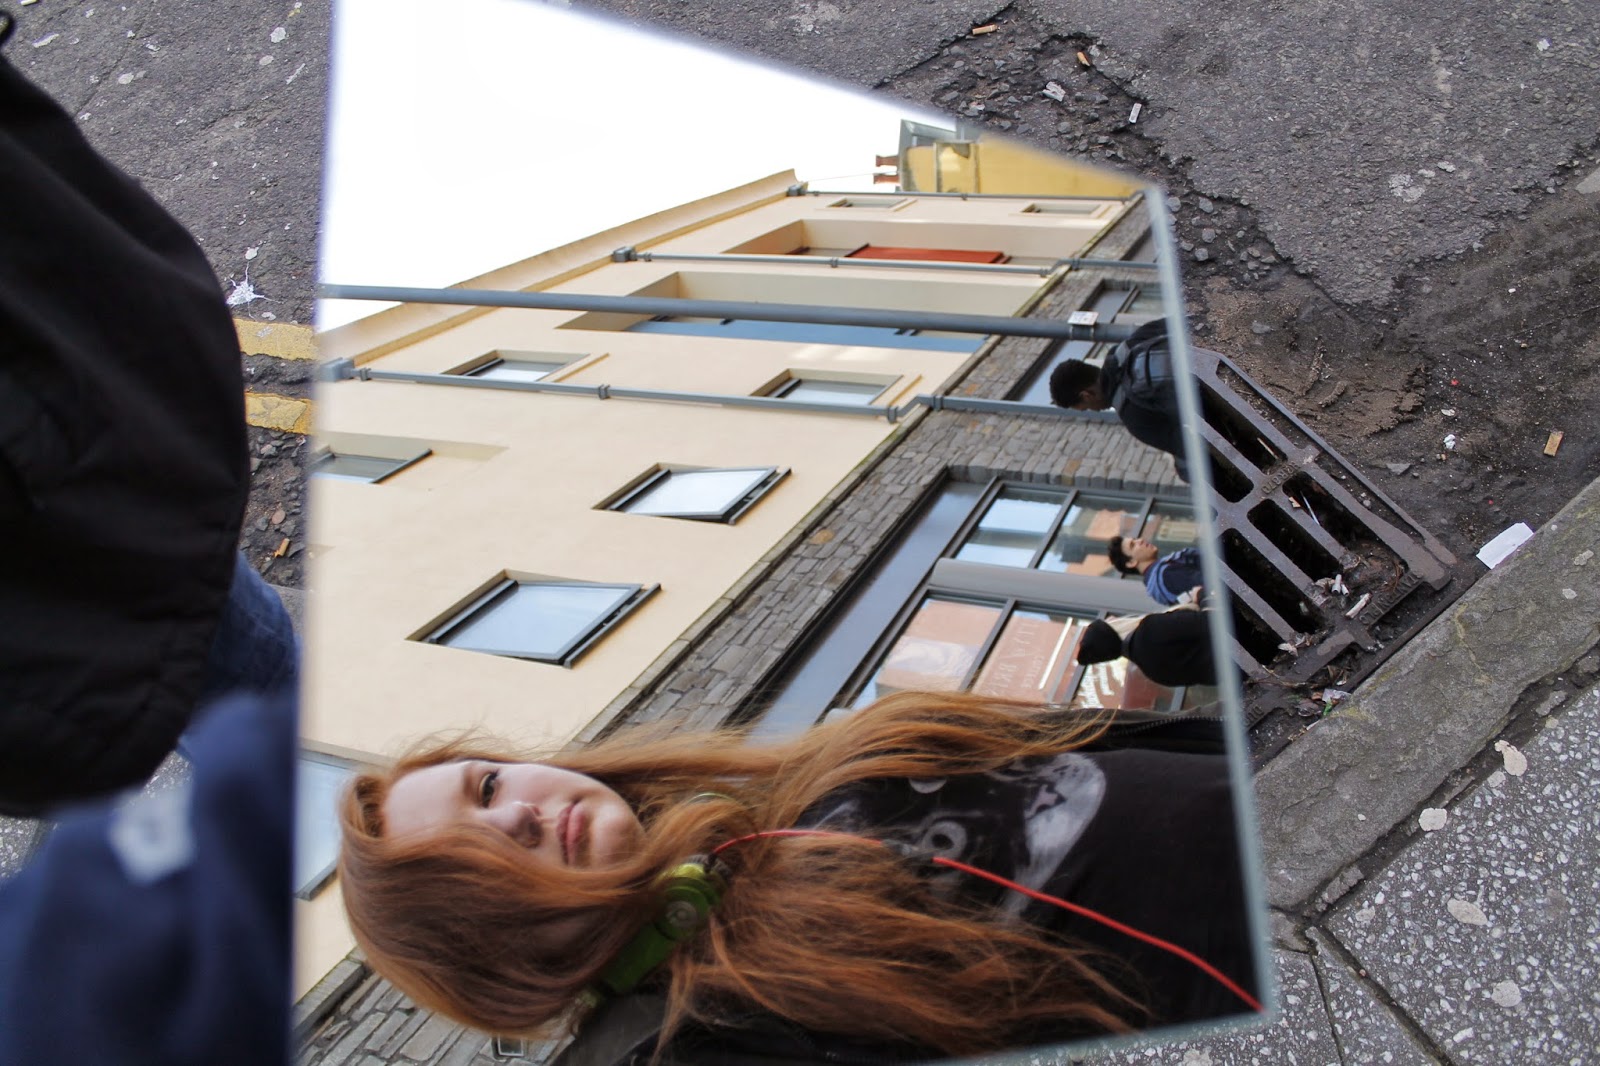
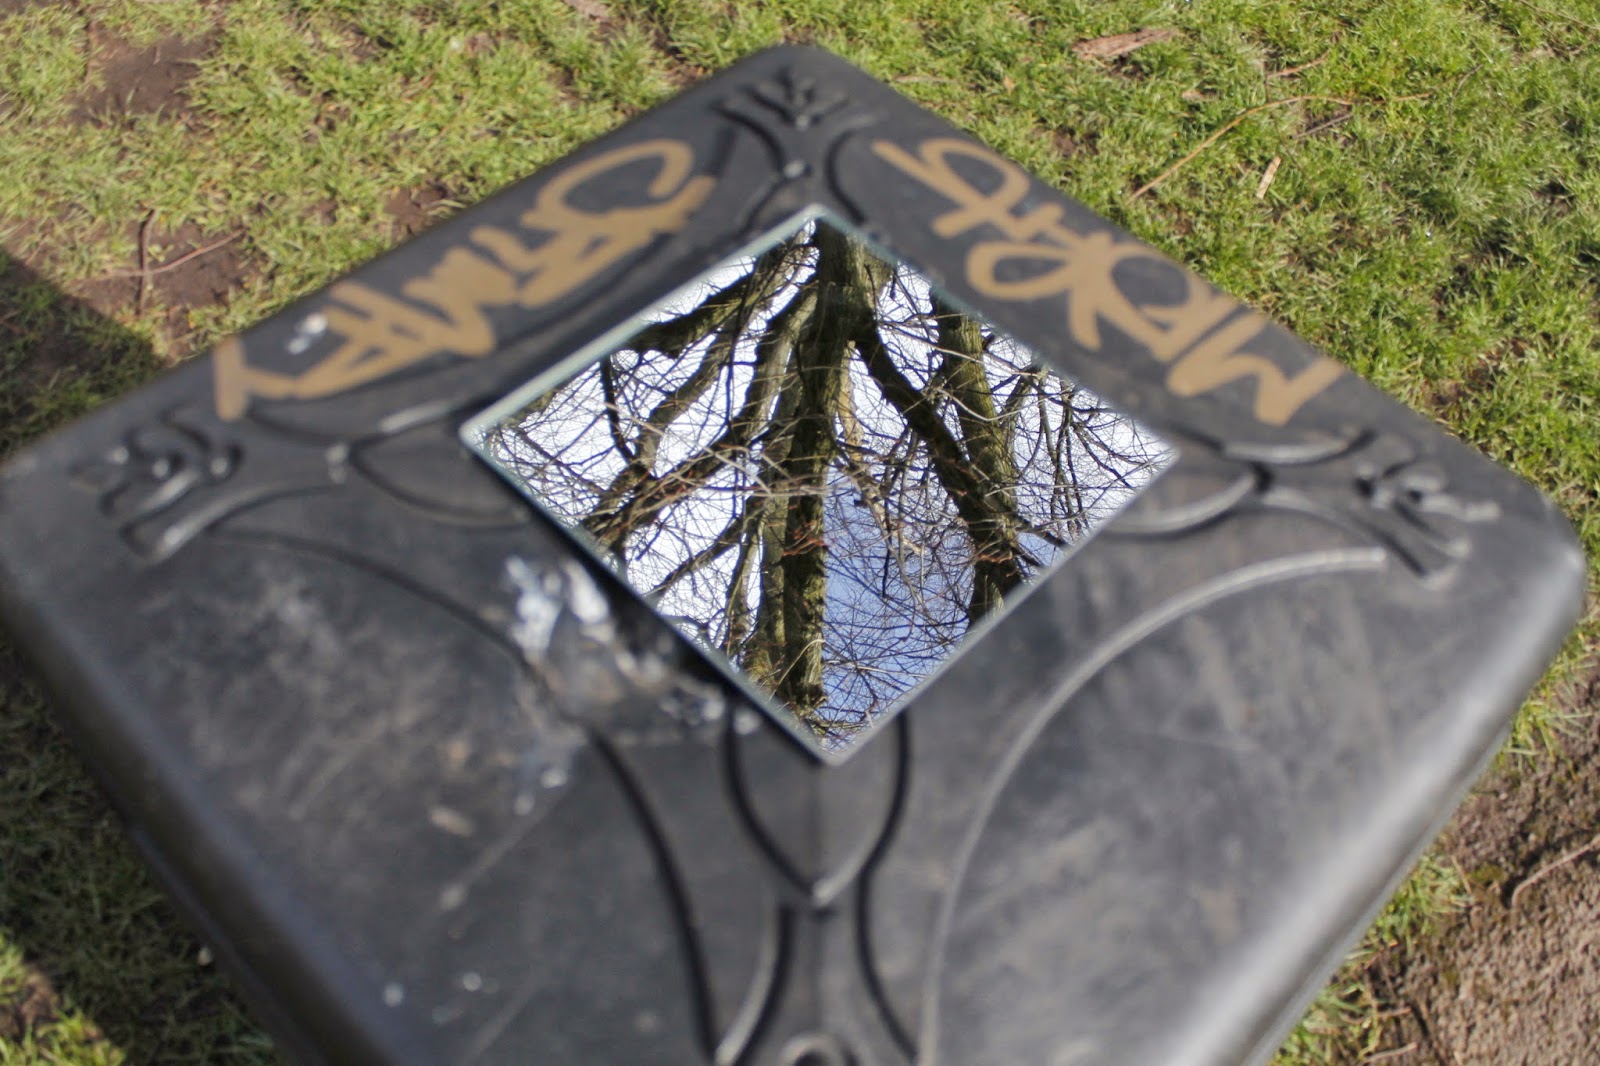
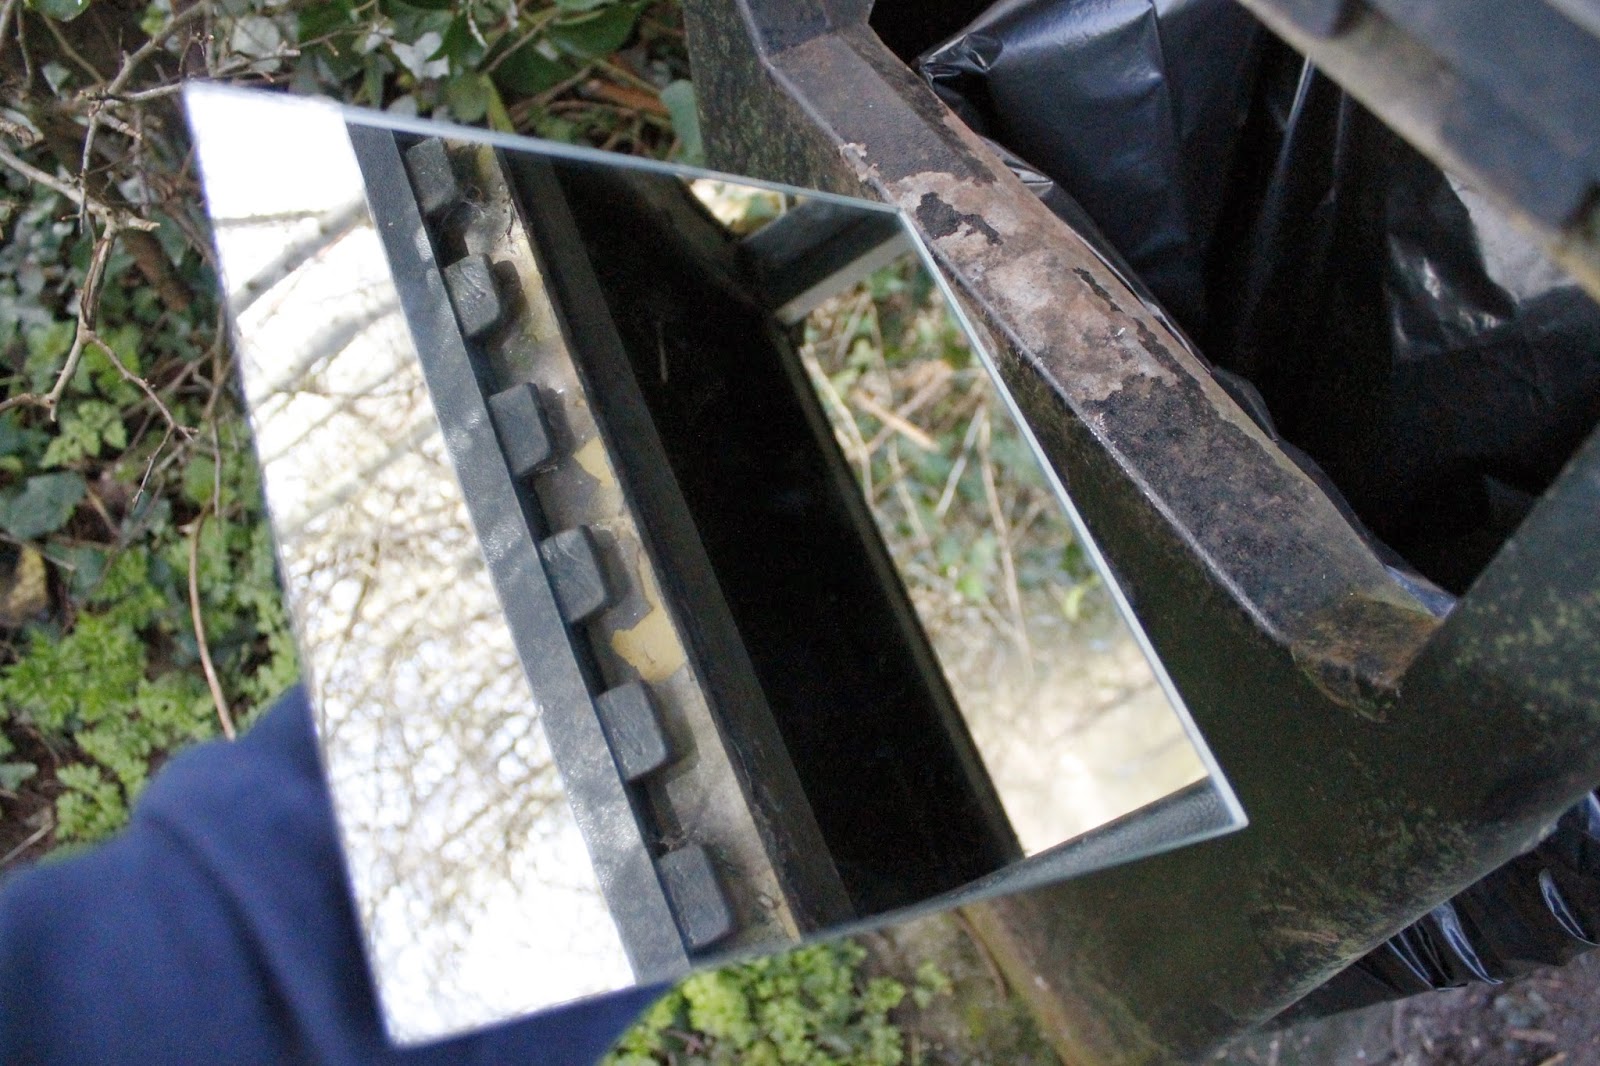
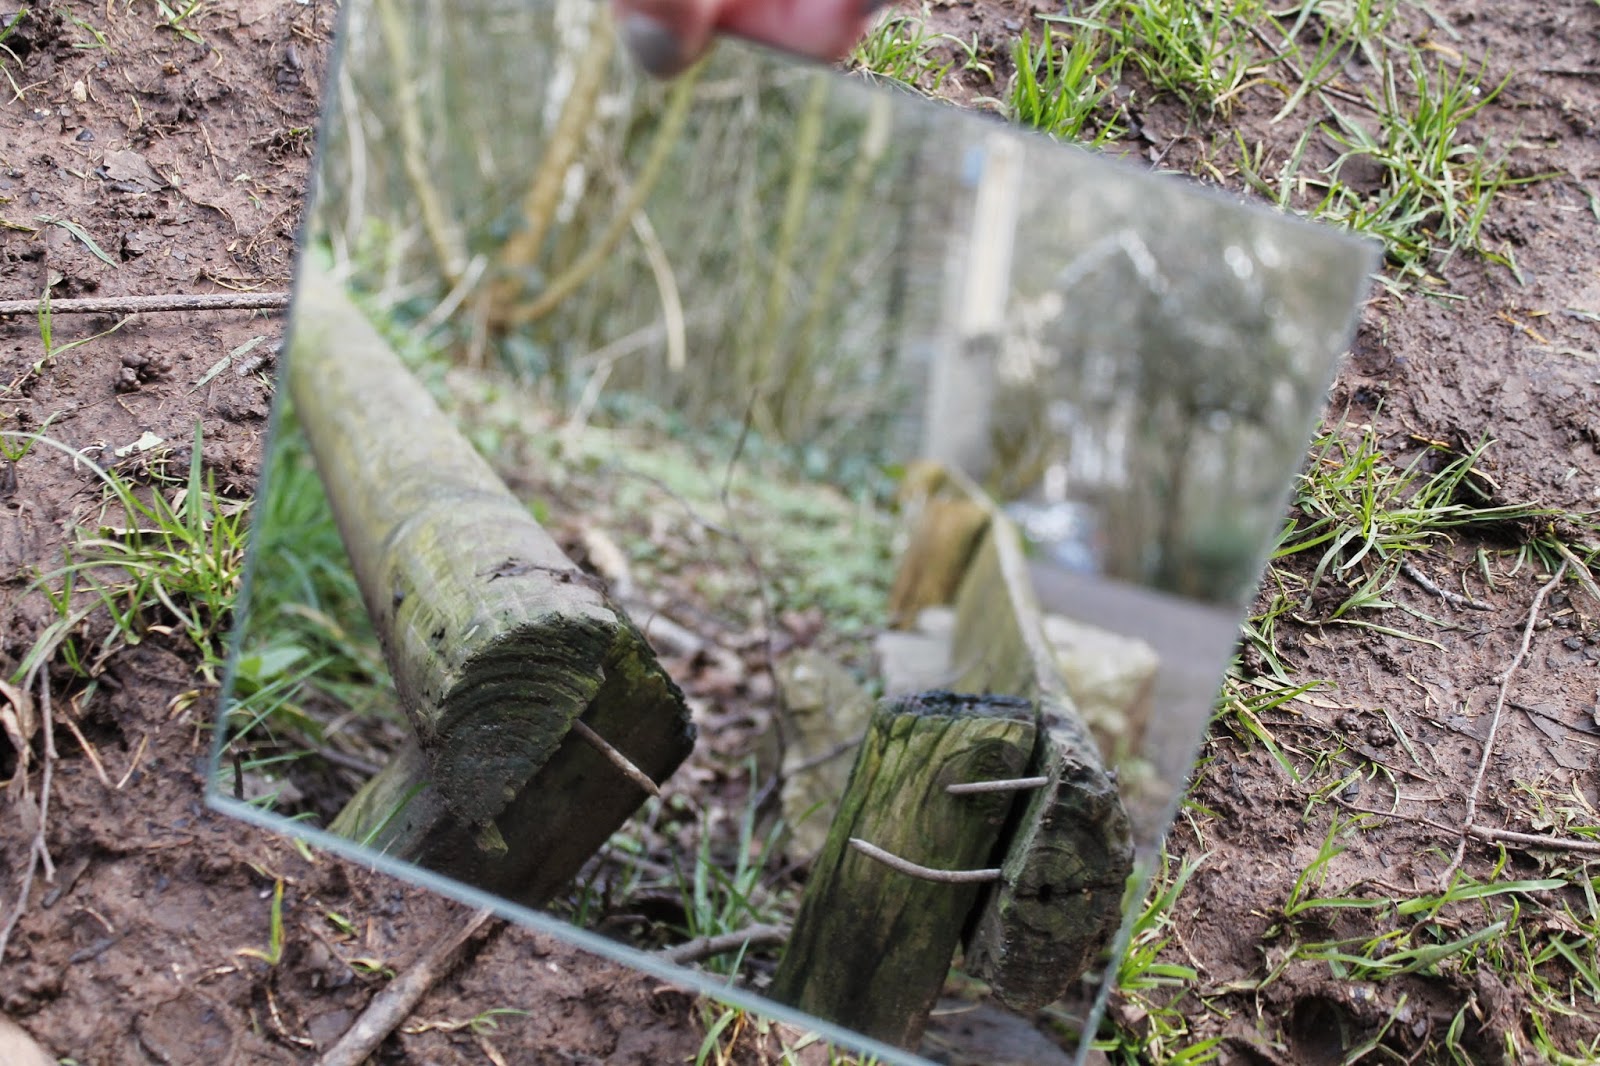
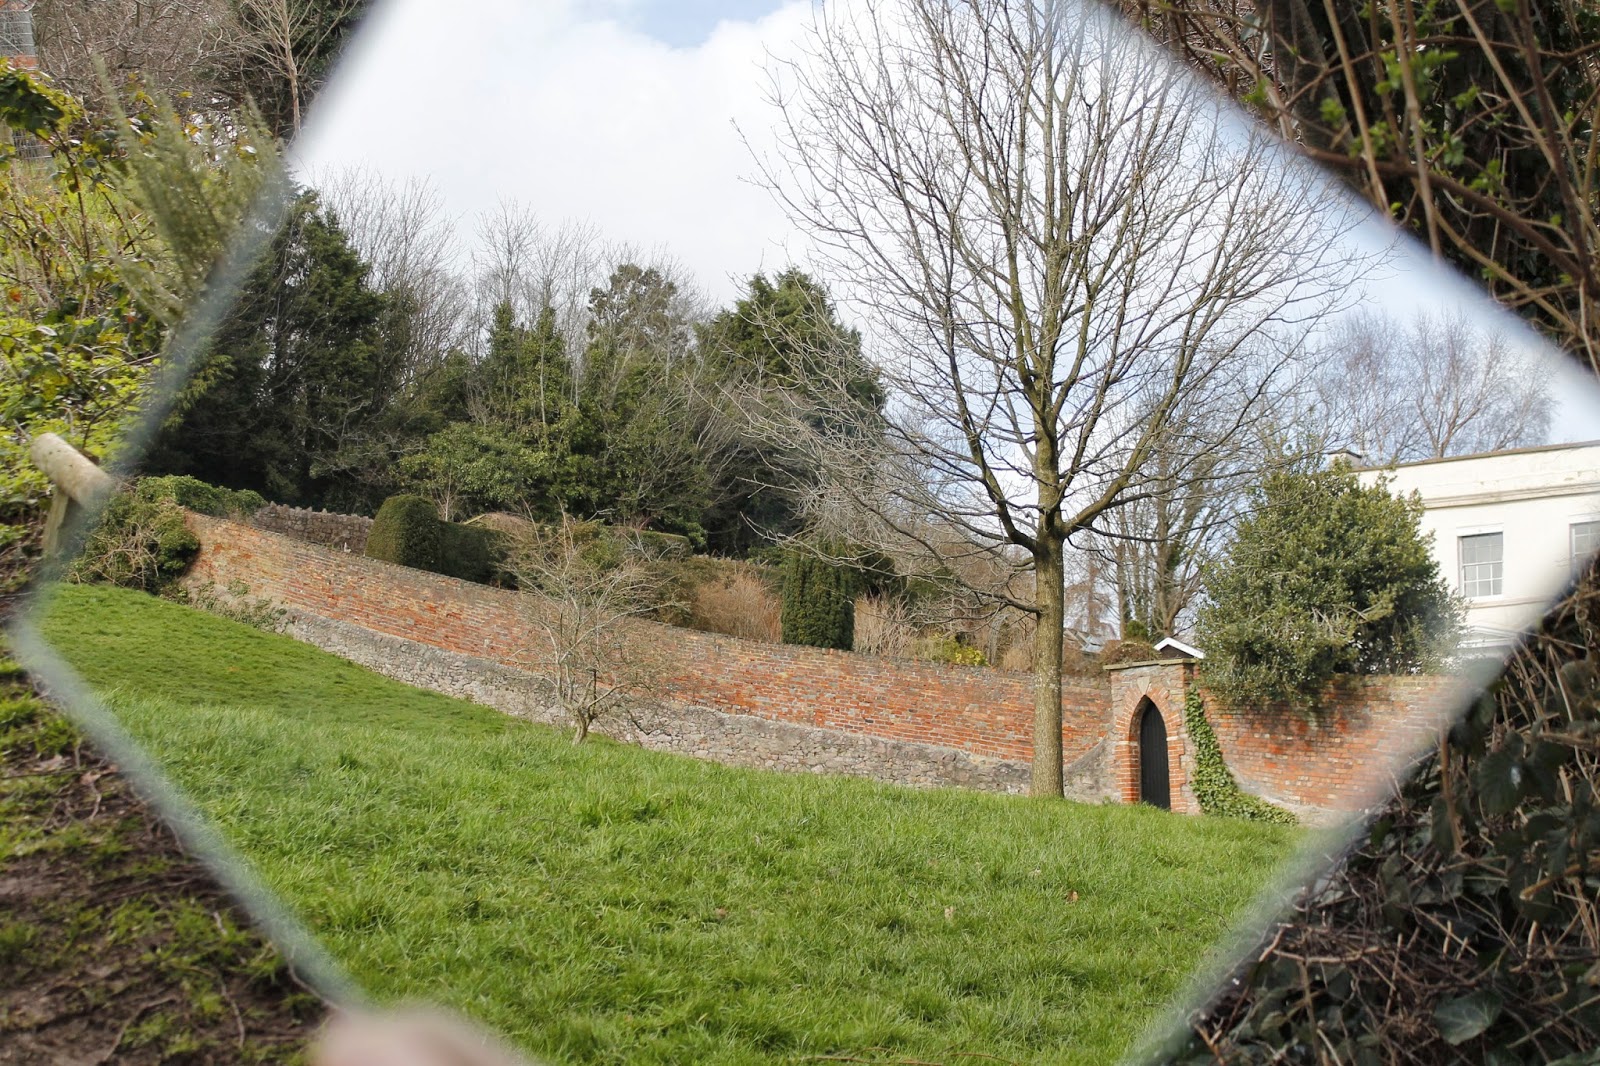

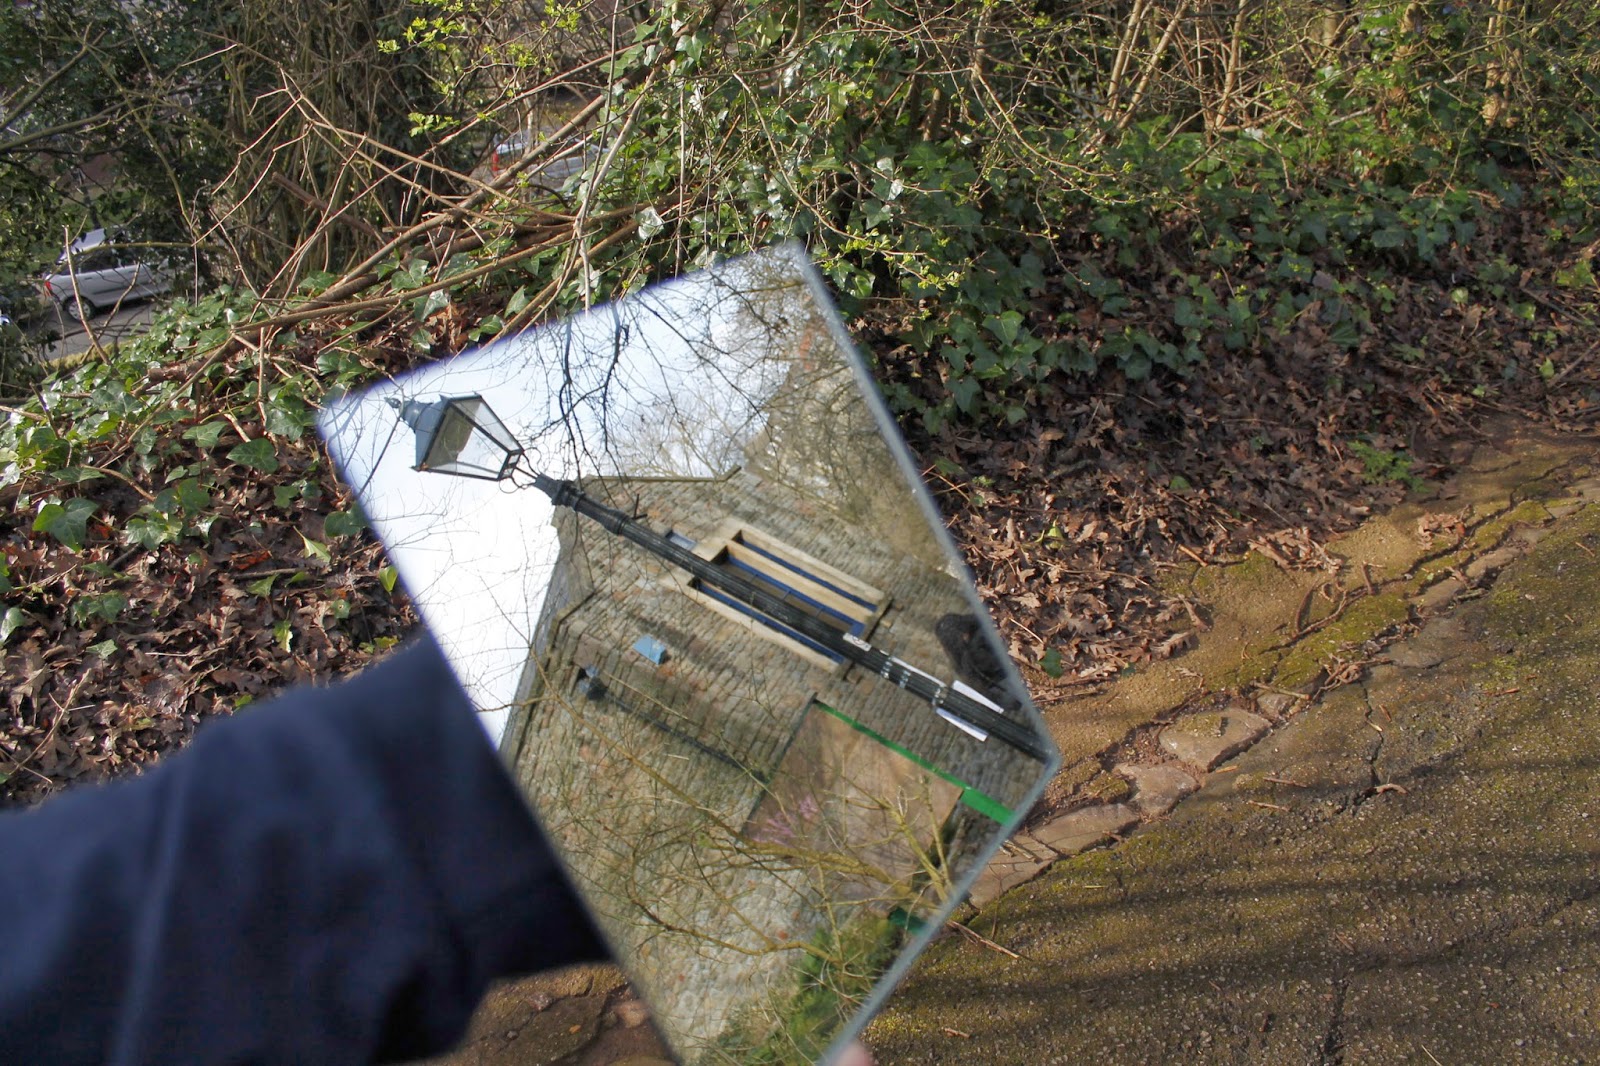

I like how my reflection images came out, I especially like the last four images. I deliberately tried to not include my fingers into the images because I thought it took away from the illusion of the mirror. The last images is a water reflection rather than a mirror reflection because I tried to make some of my work similar to Andre Kertesz's, and that was the only one that turned out presentable.
Shop windows - Eugene Atget
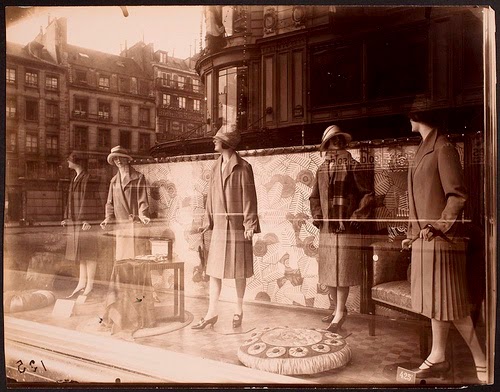
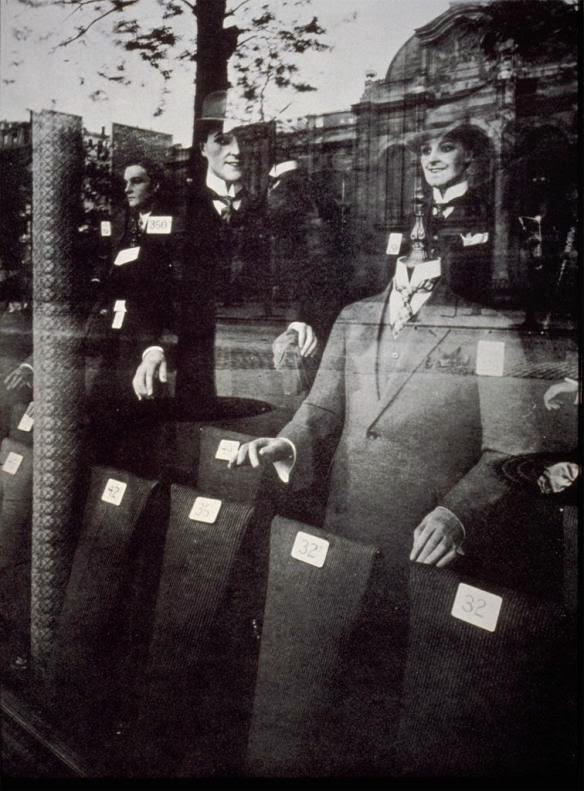
Born 1857 in France, he didn't start his photography career until 1888. He originally started off acting and going to acting schools but after finishing secondary school he joined the Merchant Navy. He was part of travelling group in Paris but due to a throat infection he had to stop acting which is when he tried painting, but did not get anywhere with it. He then went on to do photography where he started taking pictures of local places like Amiens and Beauvias. After his partner died in 1926, Man Ray started to publish lots of his pictures La Revolution Surrealist.
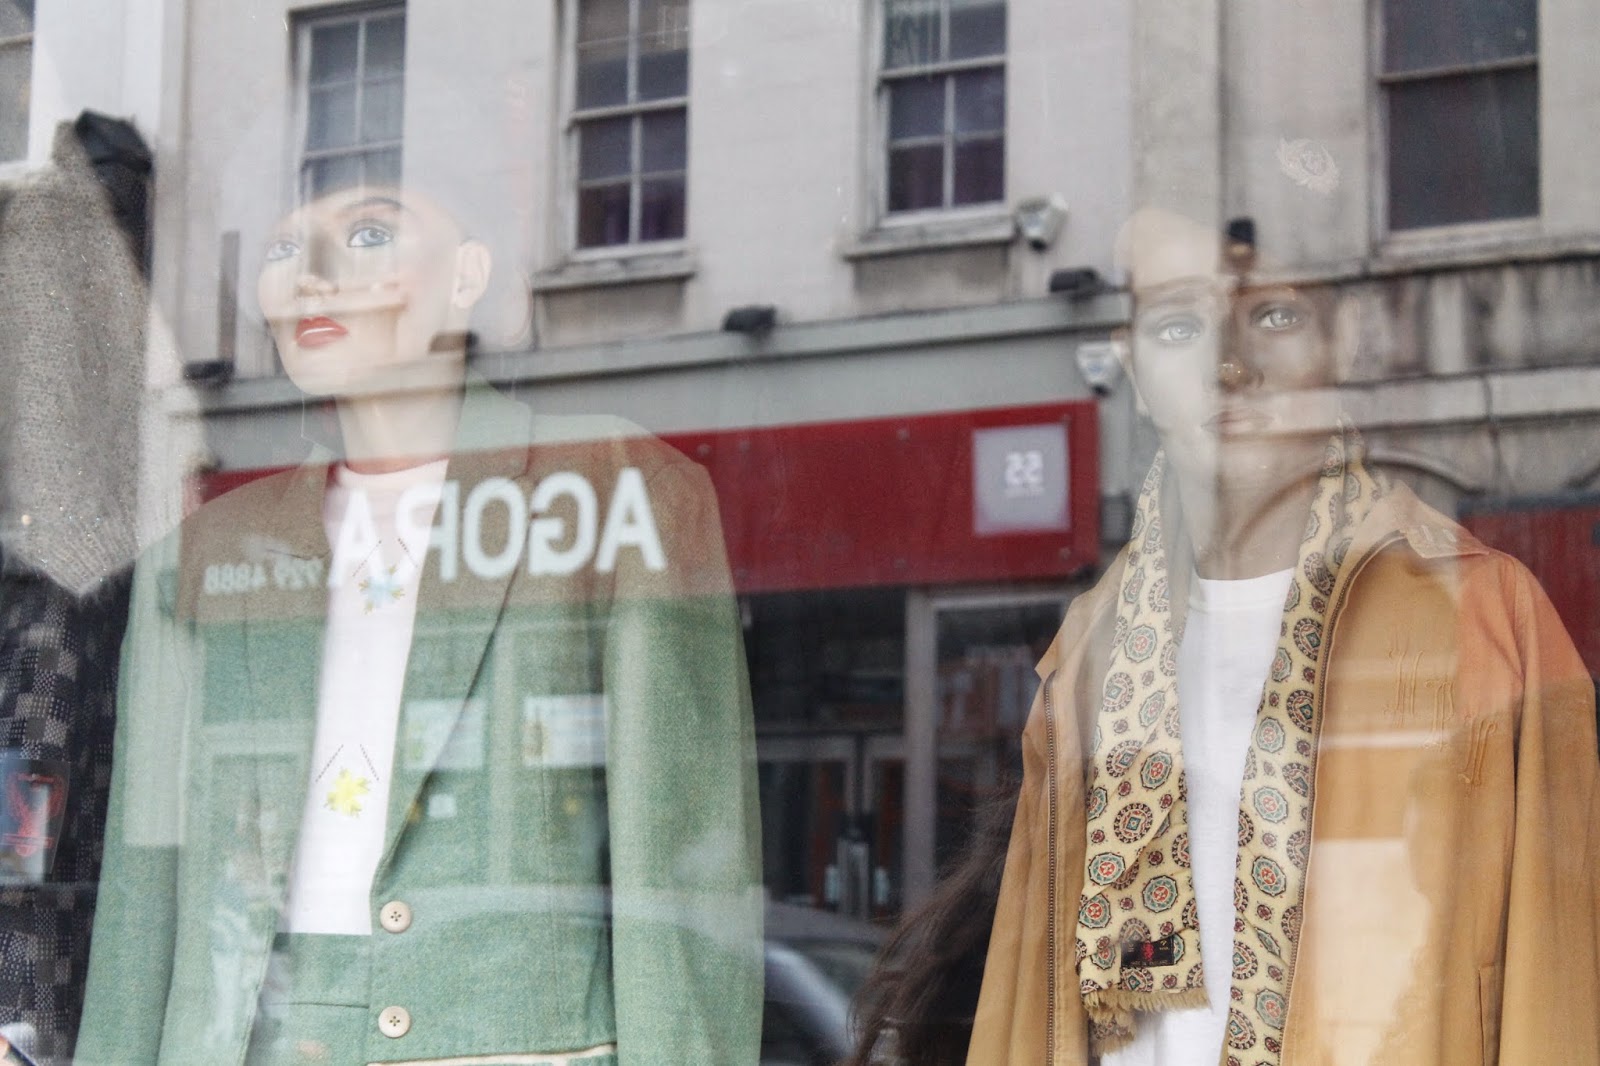

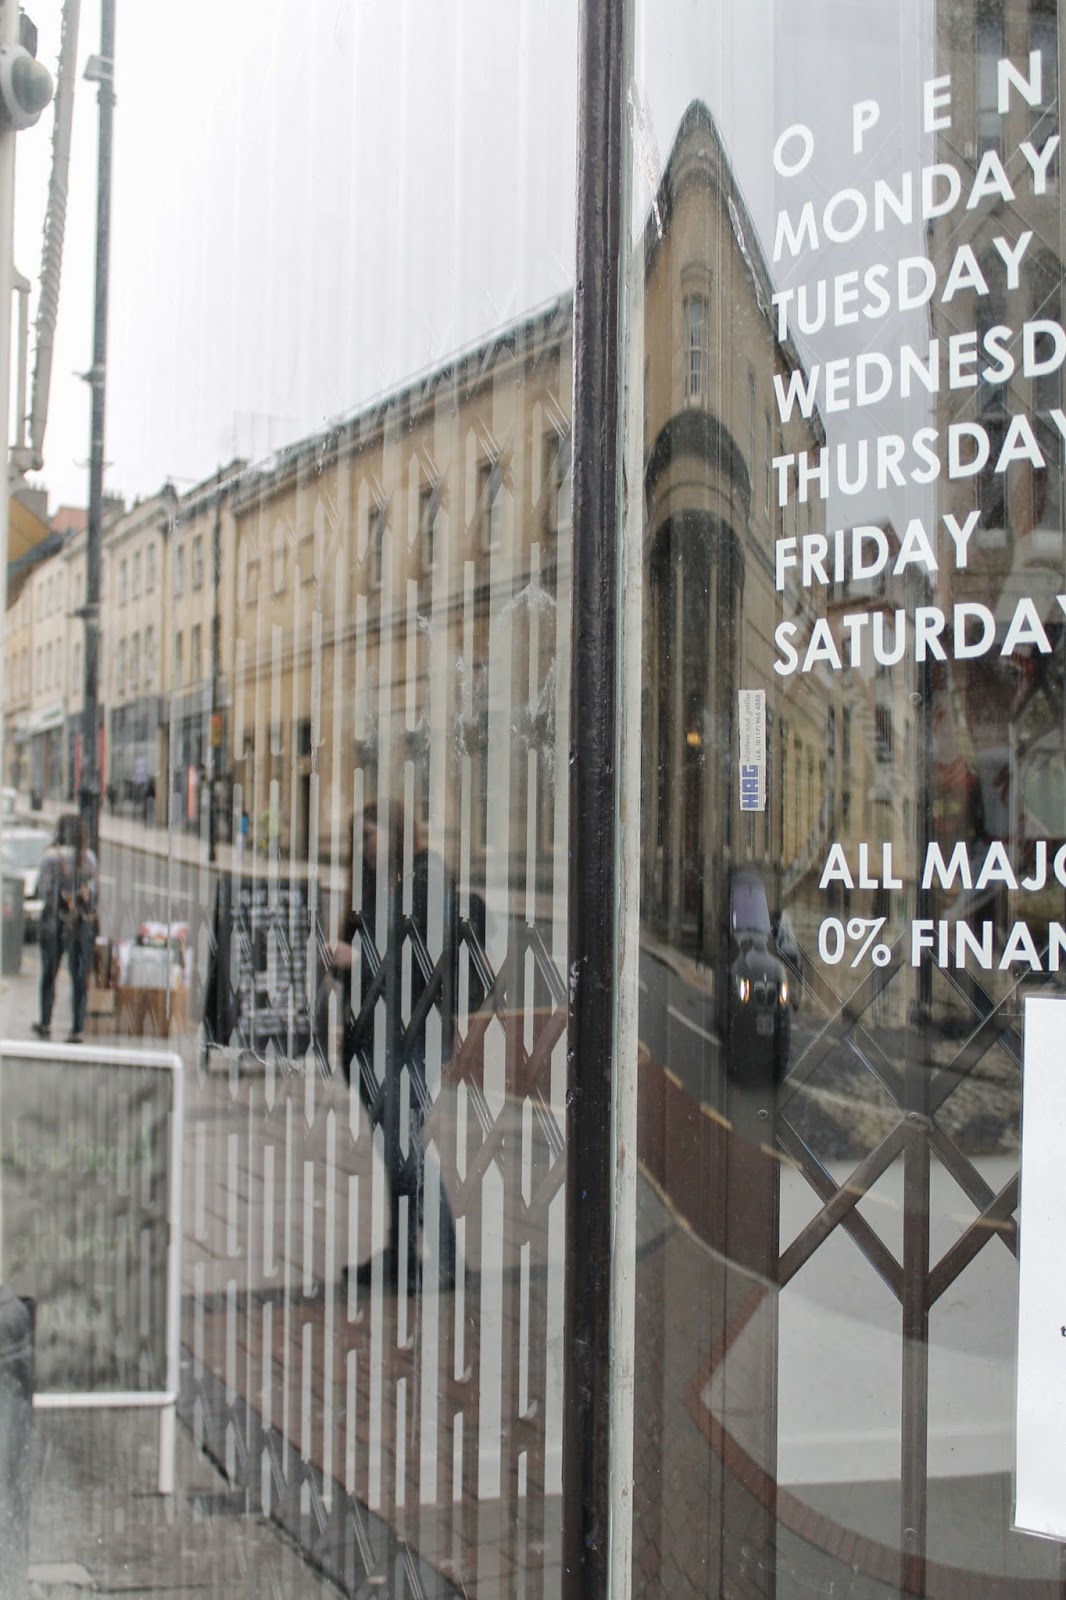

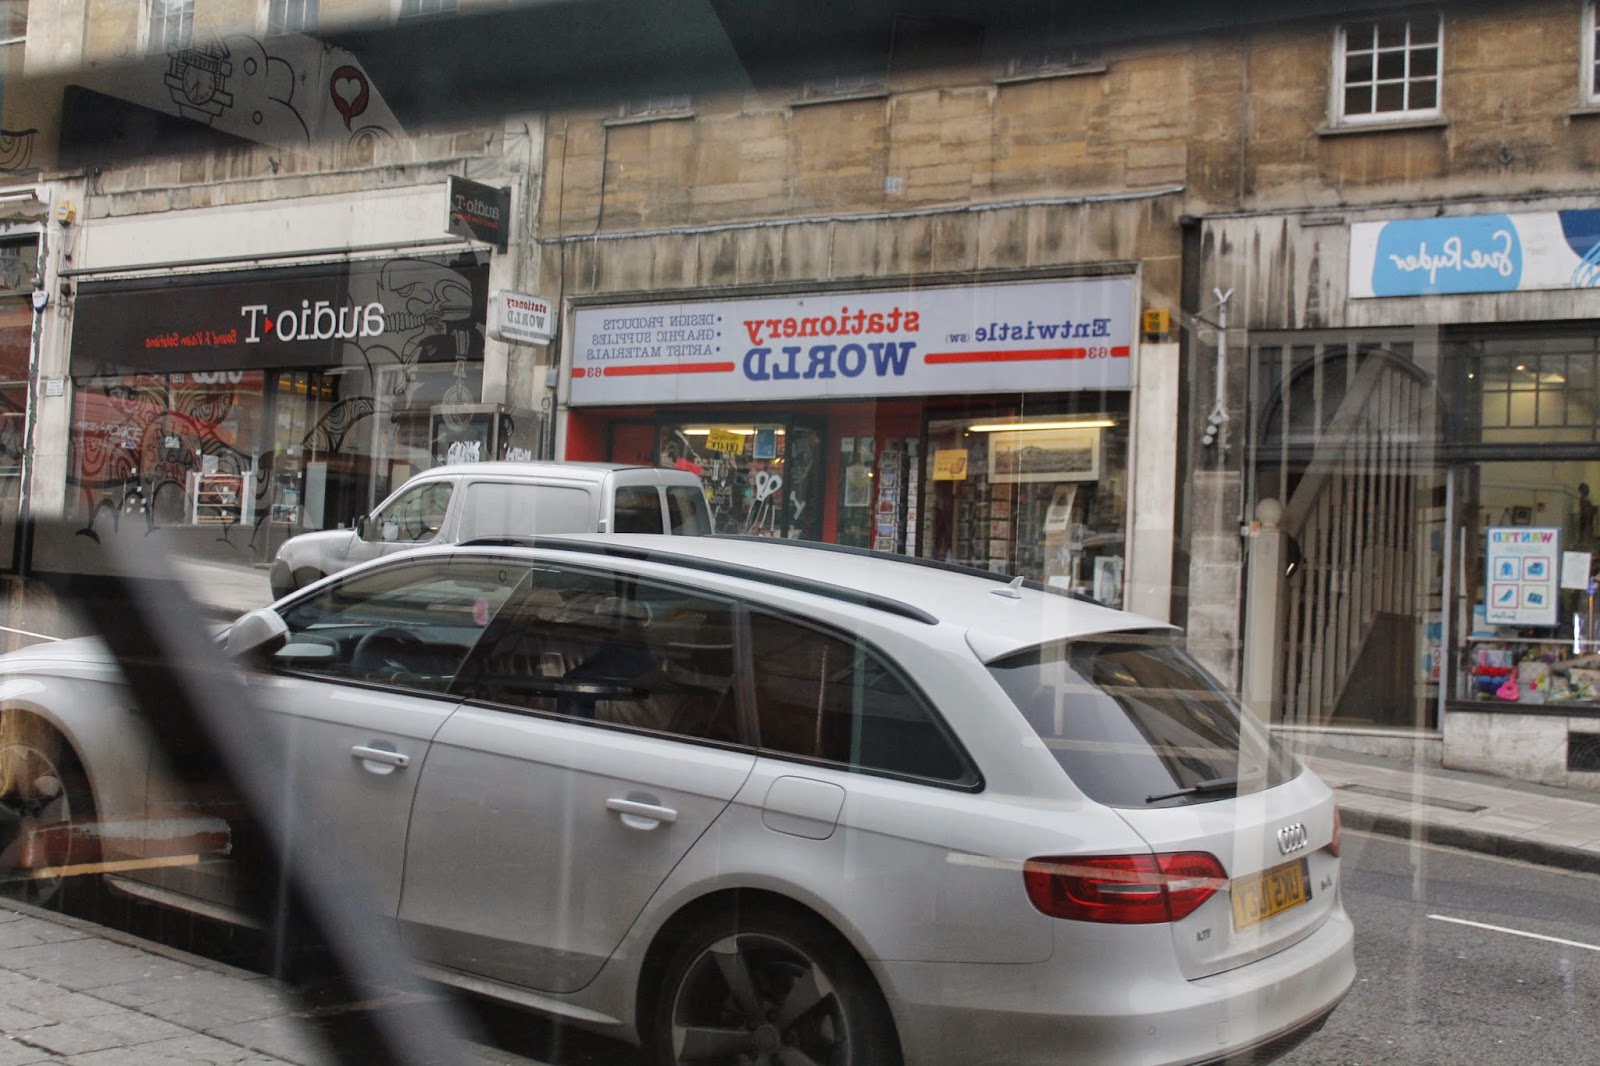
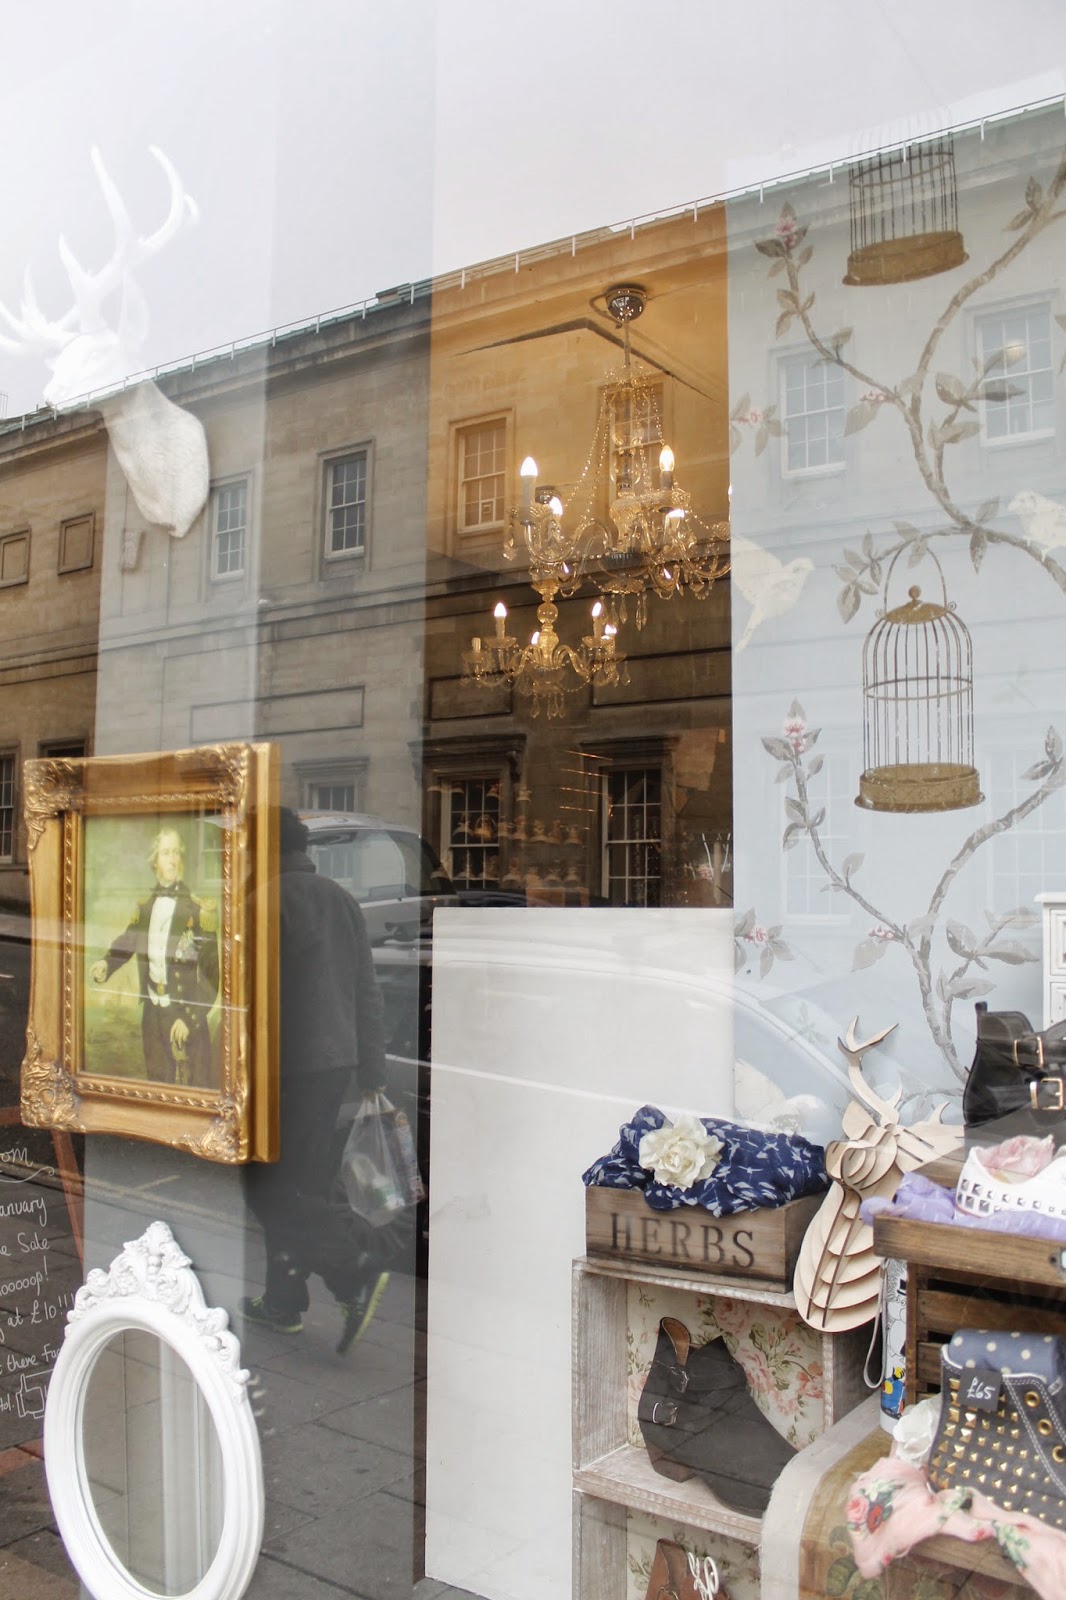
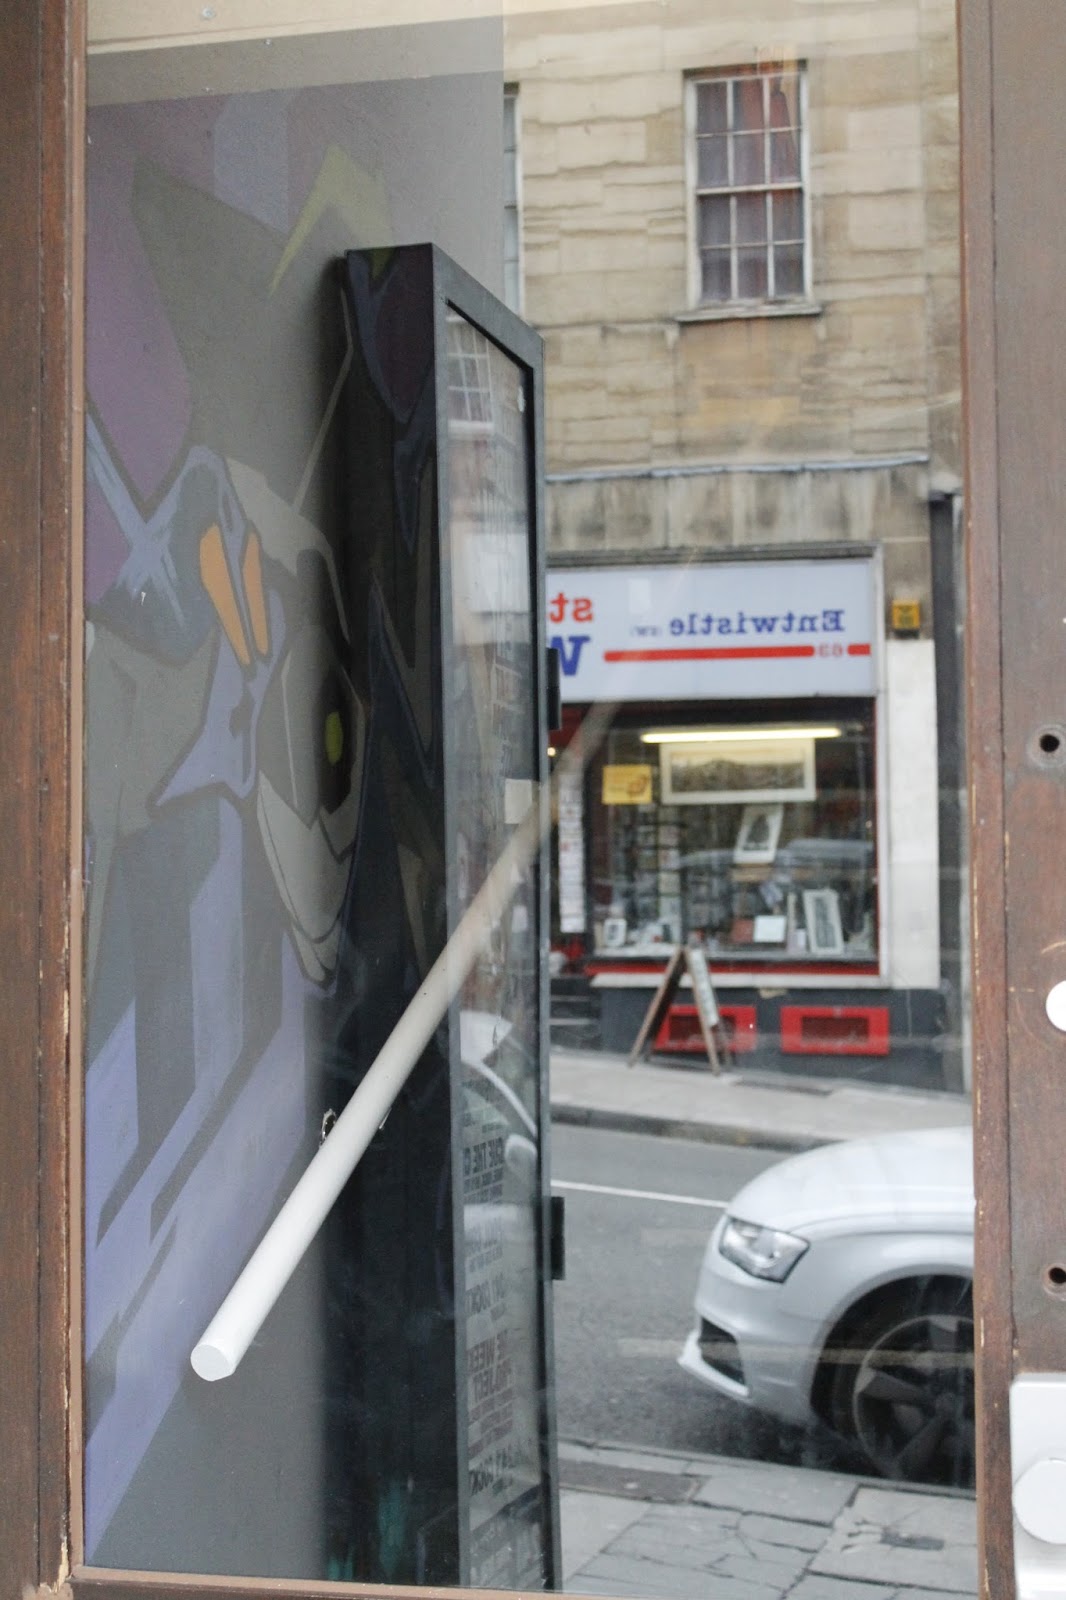
I think my pictures turned out better than expected. I especially like the one with the 'cloud effect' (to the left of this text). I tried my own way with the mannequins like Atgat's work but only one image turned out the way that I thought was vaguely like his work. I would have liked to have had more come out in a more creative way rather than just taking a picture of a shop window reflection.
Hockney Joiners - Hockney joiners is a technique used to distort images, in a collage form, but still being able to fully see what the image is. It was created by David Hockney who was born 1937 in Bradford, he was openly gay and expressed it in a lot of his art. His Joiner work can be relatable to Cubism, and he is considered one of the most influential British artists of the 20th century. The way he came about this technique was an accident, he didn't like the wide eye lens that most photographers were using so whilst working on a painting he took two polaroid pictures and put them together to see they created the wide eye lens effect themselves. I quite like David Hockney's work with the joiner concept, I feel like it adds dimension and a different aspect to an images. A lot of the time it looks like they've been painted, because of the different colours where he's taken the picture of a slightly different exposure, and I feel that gives the picture a quality of individuality and that's what usually draws the viewer to properly look at the image.

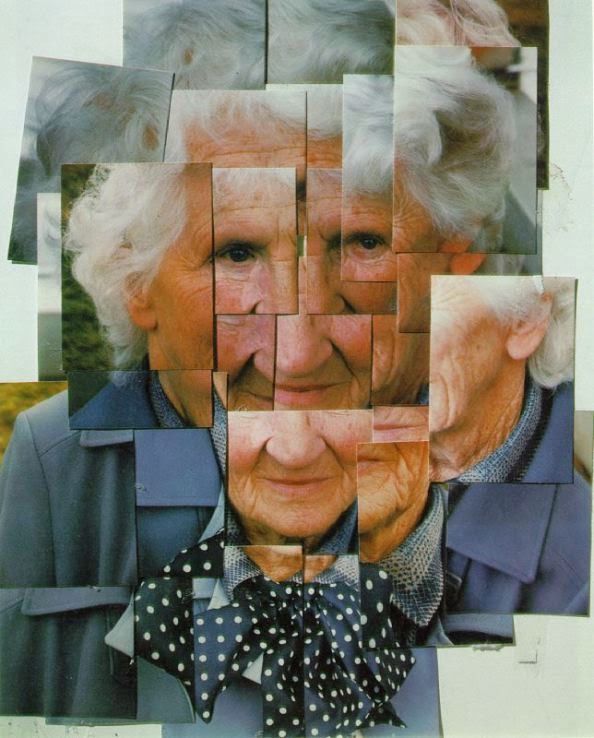
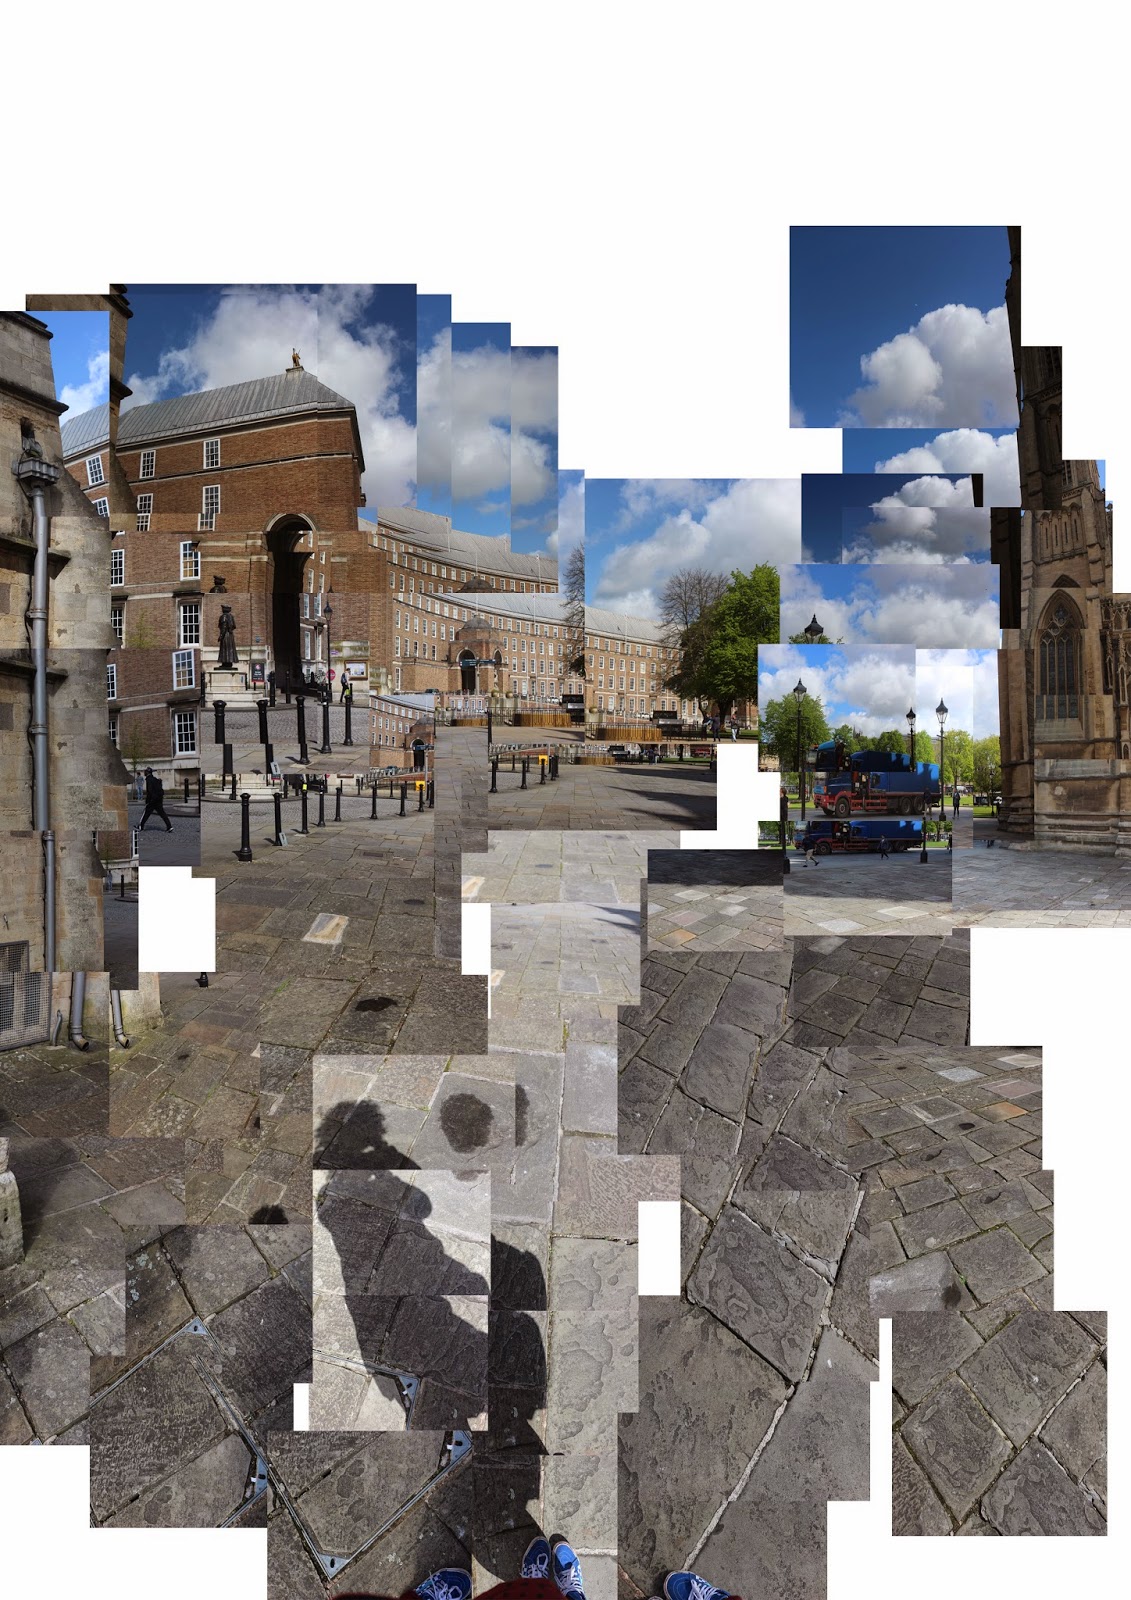 This is the 'Hockney Joiner' that I created myself: I wanted mine to be more distorted so it took a while to actually see what and where it is, I wanted people to actually focus on this. I did this the same way David Hockney did but digitally, so rather than using polaroids I used a normal DSLR and put each photograph together on photoshop. I would like to have re done mine to add more to the picture, try and make it bigger and add more to the right hand side of the picture.

 Pinhole Photography -
 Pinhole photography is, what I think, an underrated form of photography. It consist of a what is usually a beer can with a pin prick hole (pinhole) in the side of the can. This video will be able to explain how it's made and maybe a little bit more information. It's not just beer cans that can be used, people have used all sorts of shapes and sizes of boxes, cans, pots, biscuit tins etc.. obviously the results will be different.
 Justin Quinnell - Bristol based pinhole photographer who is now a lecturer and teacher who believes in using the resources around you to your advantage to teach astronomy and science as well as photography to students who don't particularly have much money to be able to afford DSLR and SLR cameras and equipment.
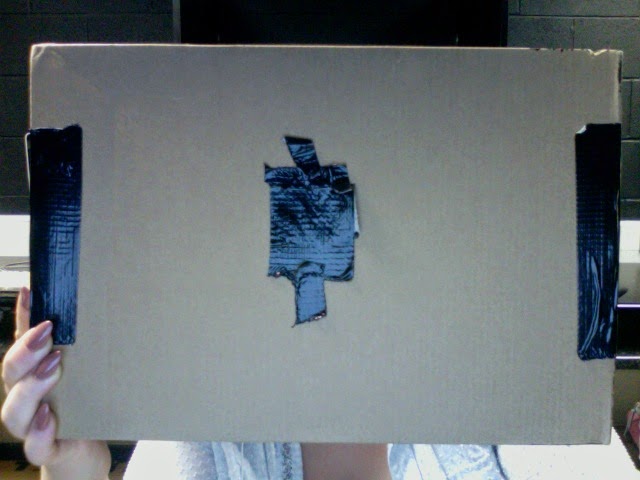
 My Pinhole camera - I actually used a shoe box, a Dr. Martens shoe box to be precise, but still used 7x5" paper. With Justin Quinnell's images, specifically the one of the suspension bridge, he didn't develop his image, he left his papaer because it's light sensitive outside for 6 months and because it's like getting a sun tan, the bits that are covered will stay the same but the bits that are exposed will be changed by the sunlight.
With my box and because it's so big it's easier to use a small square of aluminium with a pinhole in it rather than trying to put a pinhole in the box, also with the material the pinhole will come out neater on the aluminium rather the box.
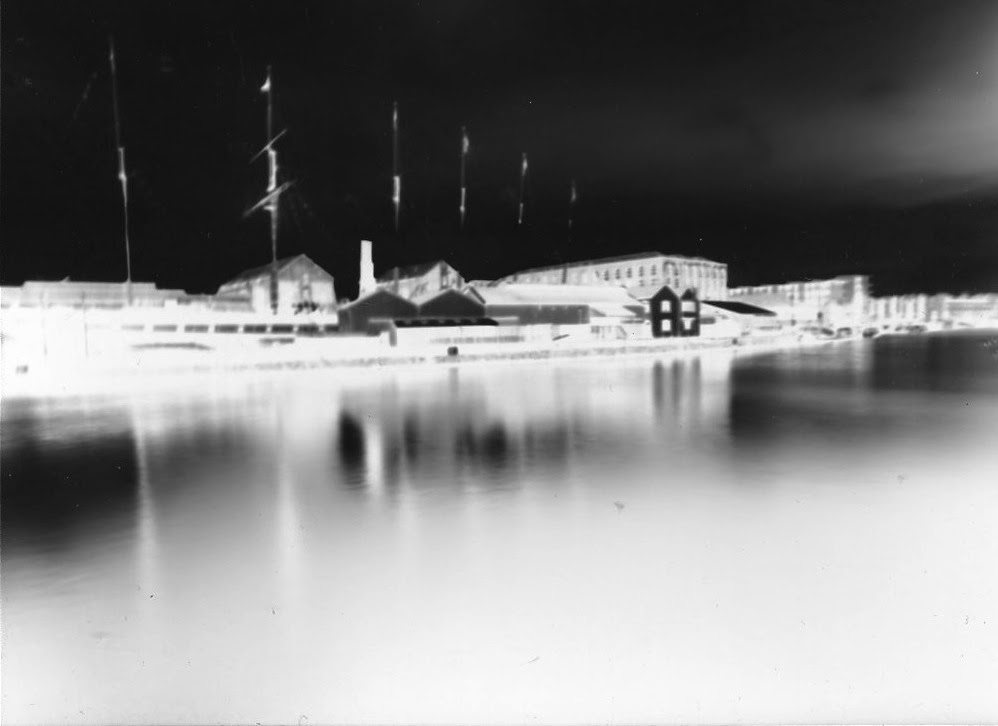
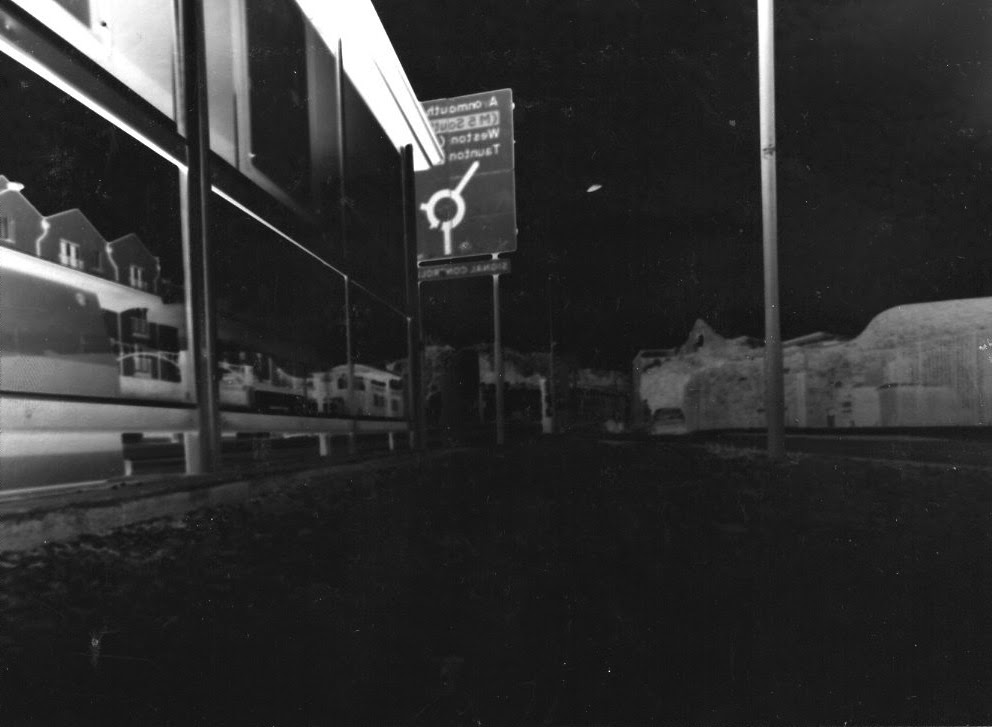
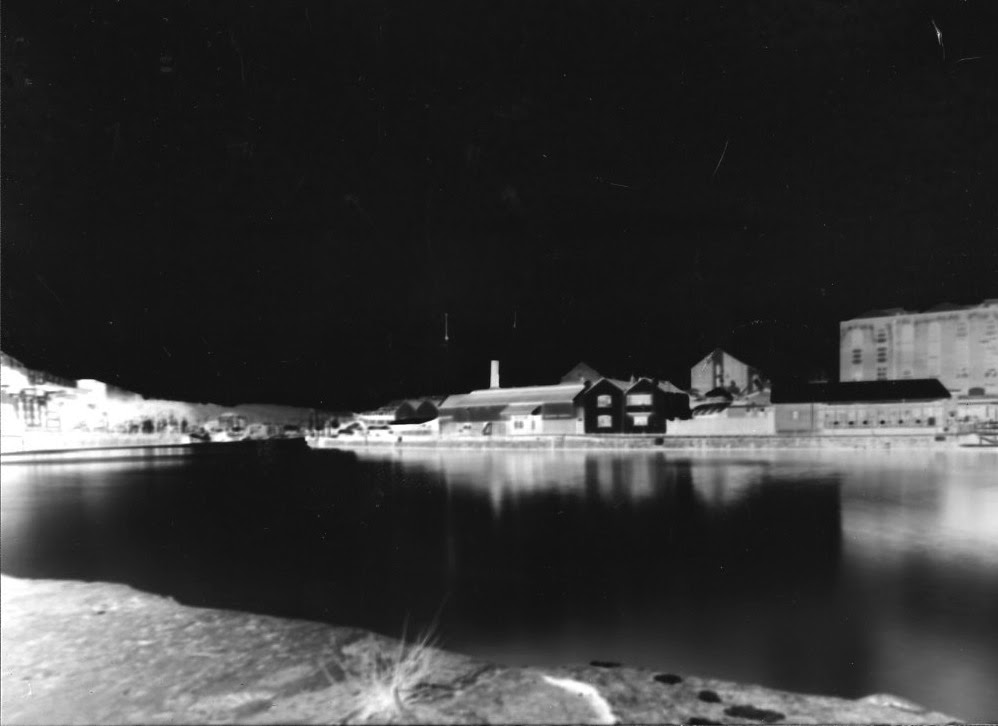 My Pinhole pictures - I like how my pinhole pictures came out, I wish I had time to experiment with exposing the light sensitive paper without developing them but that would have been something I would have wanted to do over the course of a month or more. The bottom two pictures could have come out better but I was giving my pictures and exposure of between 30 and 60 seconds as the box is so big whereas with something like a can it would have been around 10 seconds, maybe a little less as it was sunny the day we went out. I especially like how the images of the water came out because they have a ghostly effect to them


Mirrors -


I like how my reflection images came out, I especially like the last four images. I deliberately tried to not include my fingers into the images because I thought it took away from the illusion of the mirror. The last images is a water reflection rather than a mirror reflection because I tried to make some of my work similar to Andre Kertesz's, and that was the only one that turned out presentable.
Shop windows - Eugene Atget
Born 1857 in France, he didn't start his photography career until 1888. He originally started off acting and going to acting schools but after finishing secondary school he joined the Merchant Navy. He was part of travelling group in Paris but due to a throat infection he had to stop acting which is when he tried painting, but did not get anywhere with it. He then went on to do photography where he started taking pictures of local places like Amiens and Beauvias. After his partner died in 1926, Man Ray started to publish lots of his pictures La Revolution Surrealist.
I think my pictures turned out better than expected. I especially like the one with the 'cloud effect' (to the left of this text). I tried my own way with the mannequins like Atgat's work but only one image turned out the way that I thought was vaguely like his work. I would have liked to have had more come out in a more creative way rather than just taking a picture of a shop window reflection.
Hockney Joiners - Hockney joiners is a technique used to distort images, in a collage form, but still being able to fully see what the image is. It was created by David Hockney who was born 1937 in Bradford, he was openly gay and expressed it in a lot of his art. His Joiner work can be relatable to Cubism, and he is considered one of the most influential British artists of the 20th century. The way he came about this technique was an accident, he didn't like the wide eye lens that most photographers were using so whilst working on a painting he took two polaroid pictures and put them together to see they created the wide eye lens effect themselves. I quite like David Hockney's work with the joiner concept, I feel like it adds dimension and a different aspect to an images. A lot of the time it looks like they've been painted, because of the different colours where he's taken the picture of a slightly different exposure, and I feel that gives the picture a quality of individuality and that's what usually draws the viewer to properly look at the image.
This is the 'Hockney Joiner' that I created myself: I wanted mine to be more distorted so it took a while to actually see what and where it is, I wanted people to actually focus on this. I did this the same way David Hockney did but digitally, so rather than using polaroids I used a normal DSLR and put each photograph together on photoshop. I would like to have re done mine to add more to the picture, try and make it bigger and add more to the right hand side of the picture.Pinhole photography is, what I think, an underrated form of photography. It consist of a what is usually a beer can with a pin prick hole (pinhole) in the side of the can. This video will be able to explain how it's made and maybe a little bit more information. It's not just beer cans that can be used, people have used all sorts of shapes and sizes of boxes, cans, pots, biscuit tins etc.. obviously the results will be different.Justin Quinnell - Bristol based pinhole photographer who is now a lecturer and teacher who believes in using the resources around you to your advantage to teach astronomy and science as well as photography to students who don't particularly have much money to be able to afford DSLR and SLR cameras and equipment. My Pinhole camera - I actually used a shoe box, a Dr. Martens shoe box to be precise, but still used 7x5" paper. With Justin Quinnell's images, specifically the one of the suspension bridge, he didn't develop his image, he left his papaer because it's light sensitive outside for 6 months and because it's like getting a sun tan, the bits that are covered will stay the same but the bits that are exposed will be changed by the sunlight.With my box and because it's so big it's easier to use a small square of aluminium with a pinhole in it rather than trying to put a pinhole in the box, also with the material the pinhole will come out neater on the aluminium rather the box.
My Pinhole pictures - I like how my pinhole pictures came out, I wish I had time to experiment with exposing the light sensitive paper without developing them but that would have been something I would have wanted to do over the course of a month or more. The bottom two pictures could have come out better but I was giving my pictures and exposure of between 30 and 60 seconds as the box is so big whereas with something like a can it would have been around 10 seconds, maybe a little less as it was sunny the day we went out. I especially like how the images of the water came out because they have a ghostly effect to them


